Entryway Shoe Rack Ideas: Wow Your Living Room
17+ Shoe Rack in Living Room Entryway Ideas That Wow! Do you ever feel like your entryway is a chaotic shoe graveyard? You know the scene: kicked-off sneakers, muddy boots, and forgotten sandals creating a tripping hazard right where you want a welcoming first impression. It’s a frustration we’ve all lived with!
Imagine this instead: a beautifully styled entryway where every pair of shoes has its designated, elegant spot. No more clutter, just a serene and organized space that greets you and your guests with calm. Best of all, transforming your entryway often requires minimal cost and can be a weekend project at most!
In this article, I’m sharing over 17 inspiring ideas to help you find the perfect shoe rack solution. We’ll explore clever designs that maximize space, stylish options that complement your decor, and practical tips to keep your entryway looking its absolute best. Get ready to transform your entryway from cluttered chaos to a chic and functional haven!
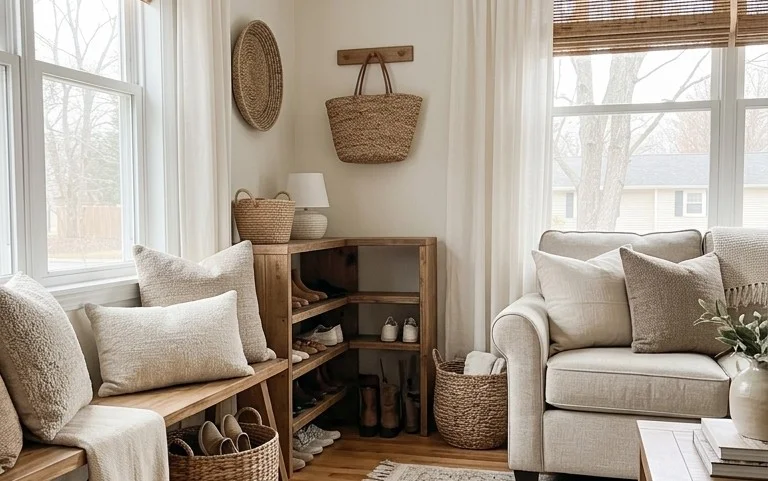
17+ Shoe Rack in Living Room Entryway Ideas That Wow
Your entryway is the first impression your home makes, and let’s be honest, a mountain of shoes can quickly derail even the most stylish welcome. A well-chosen shoe rack not only conquers clutter but also becomes a statement piece in your living room entryway. It’s a deceptively simple element that can elevate your entire space. But where do you start? How do you ensure it fits, functions, and looks fantastic? Fear not, fellow home enthusiasts! I’ve scoured, experimented, and gathered insights to bring you over 17 stunning entryway shoe rack ideas that will wow your guests and bring you daily peace of mind.
What You Need and Roughly What It Costs
Before we dive into the glorious world of shoe storage, let’s talk practicalities. The “what” and “how much” depend heavily on the type of shoe rack you envision.
* **For Basic Racks:** Think simple tiered shelves or stackable cubbies.
* **Materials:** Primarily wood (particleboard, MDF, solid pine), metal (powder-coated steel, iron), or bamboo.
* **Tools (if assembling):** Screwdriver (Phillips head is most common), possibly a rubber mallet for dowels.
* **Rough Cost:** $20-$100 for basic, mass-produced units. Solid wood or more stylish metal options will creep up to $150-$300.
* **For More Involved Solutions (DIY or Custom):**
* **Materials:** Plywood, MDF, lumber, shelves, brackets, hardware (screws, nails, wood glue), stain or paint, sealant.
* **Tools:** Saw (hand saw, circular saw, or miter saw), drill, measuring tape, level, sandpaper, paintbrushes/rollers.
* **Rough Cost:** DIY can range from $50-$200 depending on the complexity and materials. Custom built-ins can cost $300-$1000+.
* **For Rental-Friendly Solutions (No Drilling):**
* **Materials:** Freestanding units, tension rod shelves, over-the-door organizers, adhesive hooks.
* **Rough Cost:** $20-$150.
How to Measure and Plan Before You Start
This is the most crucial step, and skipping it is a recipe for regret. Measure twice, buy once!
1. **Assess Your Space:**
* **Width:** Measure the available wall space where the shoe rack will sit. Don’t forget to account for doorways, light switches, or existing furniture that might obstruct placement. A typical entryway width might be anywhere from 3 to 6 feet (90 cm to 180 cm).
* **Depth:** Consider how far out the rack can protrude into the walkway without causing a tripping hazard. You don’t want to block traffic flow. Aim for a depth of no more than 12-18 inches (30-45 cm) for most areas.
* **Height:** If you’re considering vertical storage, measure the wall height from the floor to any obstructions like picture rails or light fixtures. Standard ceiling heights are 8-10 feet (2.4-3 meters).
2. **Count Your Shoes:** Be honest! How many pairs of shoes do you *actually* store in your entryway? Differentiate between everyday shoes, guest shoes, and seasonal items. A family of four might have 20-30 pairs regularly in use.
3. **Consider Shoe Types:** Do you have bulky boots, delicate heels, or a collection of sneakers? This will influence the shelf height and depth you need. Boots might require shelves of 14-18 inches (35-45 cm) height, while flats can fit in much shallower spaces.
4. **Style and Functionality:** What aesthetic are you going for? Modern, rustic, minimalist? Do you need seating as well? Do you want closed storage for a neater look?
A Clear Numbered Walkthrough of the Process
Let’s assume you’ve chosen a freestanding, multi-tiered shoe rack. The process is usually straightforward:
1. **Unpack and Inspect:** Carefully unpack all components and check for any damage or missing parts against the instruction manual. Lay everything out on a clean, flat surface.
2. **Identify Parts:** Familiarize yourself with each piece – sides, shelves, back panel (if applicable), hardware.
3. **Attach Side Panels:** Typically, you’ll attach the side panels to the base or the first shelf using screws or cam locks. Ensure they are oriented correctly according to the diagram.
4. **Insert Shelves:** Slide or screw the shelves into place. If using dowels, gently tap them in with a rubber mallet. Make sure each shelf is level.
5. **Attach Back Panel (If Applicable):** If your rack has a back panel, it usually slides into pre-grooved channels or is attached with small nails or screws. This adds stability.
6. **Final Tightening:** Once all components are assembled, go back and gently tighten all screws. Be careful not to overtighten, which can strip the threads or damage the material.
7. **Position and Test:** Carefully move the assembled shoe rack to its designated spot. Place a few shoes on it to ensure it’s stable and can hold the weight.
How to Adapt It for a Small Space or a Rental Where You Cannot Drill
This is where creativity shines!
* **Small Spaces:**
* **Vertical is Your Friend:** Opt for tall, narrow shoe racks. Think tiered racks that go up rather than out.
* **Corner Units:** Utilize awkward corners with specially designed corner shoe racks.
* **Under-Bench Storage:** A bench with built-in shoe cubbies is a dual-purpose savior.
* **Slim Console Tables with Shelves:** A narrow console table with a shelf or two underneath can discreetly store flats and smaller shoes.
* **Rental-Friendly (No Drilling):**
* **Freestanding Units:** The most obvious choice. Look for sturdy, well-built freestanding units.
* **Tension Rod Shelving:** Install tension rods across the bottom of a closet or in an alcove. You can then place shoe shelves or even sturdy baskets on them.
* **Over-the-Door Shoe Organizers:** These fabric or plastic organizers hang on the back of your entryway door. They can hold a surprising number of shoes, from flats to children’s shoes.
* **Adhesive Hooks:** For lighter shoes like flip-flops or sandals, strong adhesive hooks (ensure they are rated for weight) can be mounted on the wall.
* **Stackable Cubbies:** Many modular cubby systems can be stacked without being screwed to the wall.
* **Rolling Shoe Carts:** These can be tucked away when not in use.
Styling Notes: Color, Texture, and What to Put Where
A shoe rack shouldn’t just be functional; it should enhance your entryway’s aesthetic.
* **Color:**
* **Neutrals:** White, black, grey, and natural wood tones are versatile and blend seamlessly with most decor.
* **Statement Colors:** If your entryway is otherwise minimalist, a shoe rack in a bold color (e.g., a deep teal or a rich burgundy) can act as a beautiful focal point.
* **Match Existing Furniture:** Consider matching the finish of your shoe rack to your existing console table or accent furniture for a cohesive look.
* **Texture:**
* **Wood:** Offers warmth and natural beauty, from sleek modern finishes to rustic distressed looks.
* **Metal:** Can lend an industrial, minimalist, or even ornate feel depending on the design and finish.
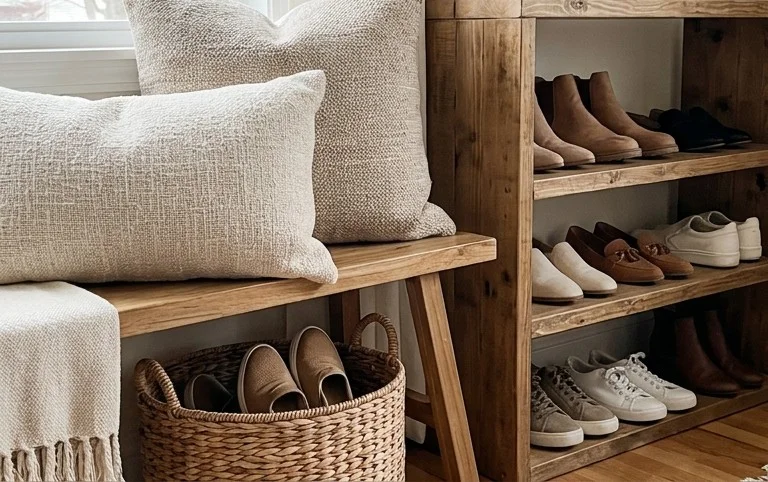
* **Woven Baskets:** Integrate baskets on shelves for a softer, more bohemian vibe. They’re also great for corralling smaller items or keeping shoes from slipping.
* **What to Put Where:**
* **Top Shelf/Surface:** This is prime real estate! Use it for decorative items like a small plant, a framed photo, a decorative bowl for keys, or a scented candle. This draws the eye upwards and away from the shoes themselves.
* **Middle Shelves:** This is for your most frequently worn shoes. Keep them organized by type or by family member.
* **Lower Shelves/Bottom:** Ideal for less frequently used shoes, bulkier boots, or perhaps guest shoes.
* **Baskets:** Use woven baskets on shelves for smaller items like sandals, flip-flops, or even cleaning supplies for your shoes.
* **Vertical Organizers:** If you have tall racks, consider dedicating a section to boots, using boot shapers to keep them upright.
How to Keep It Tidy After Week One
The honeymoon phase of a perfectly organized entryway won’t last forever. Here’s how to maintain it:
1. **The “One In, One Out” Rule:** When a new pair of shoes comes in, an old pair needs to go. This prevents accumulation.
2. **Designated Spots:** Every pair of shoes needs a home. Train yourself and your family to put shoes back in their designated spots immediately after wearing.
3. **Regular Purge:** Once a month, do a quick sweep. Remove any shoes that are worn out, haven’t been worn in a year, or are no longer needed. Donate them or discard them appropriately.
4. **Weekly Wipe Down:** Give the shoe rack a quick dusting and wipe with a damp cloth. This prevents dust bunnies and keeps it looking fresh.
5. **Shoe Rotation:** Store seasonal shoes elsewhere (e.g., in closets or under the bed) to keep the entryway clutter-free. Bring out only what’s appropriate for the current weather.
6. **Entryway “Catch-All” Basket:** Have a designated basket near the shoe rack for items that don’t belong on the rack itself – umbrellas, dog leashes, mail. This prevents them from cluttering the shoe storage.
The Mistakes That Make This Fail
Even the best intentions can go awry. Here are common pitfalls to avoid:
* **Underestimating Shoe Volume:** Buying a rack that’s too small for your actual shoe collection is the most common mistake. It leads to overflow and chaos.
* **Ignoring Space Constraints:** A beautiful shoe rack that blocks your doorway or makes your entryway feel cramped is a disaster. Always prioritize functionality and flow.
* **Poor Quality Materials:** Cheaply made racks can warp, break, or become unstable quickly, leading to frustration and replacement costs.
* **Not Considering Accessibility:** If the shelves are too high or too low, or if it’s difficult to get shoes in and out, it won’t get used consistently.
* **Lack of a Maintenance Plan:** Assuming organization is a one-time event is unrealistic. Without a regular tidy-up routine, even the most perfect system will devolve.
* **Over-Styling with Clutter:** While styling is important, don’t let decorative items become clutter themselves. Keep the top surface purposeful and visually appealing without being overwhelming.
* **Forgetting About Cleaning:** Shoes track in dirt and dust. If the shoe rack isn’t easy to clean, it can become a breeding ground for germs and a visual eyesore.
By planning carefully, choosing wisely, and committing to a little ongoing maintenance, your entryway shoe rack can transform from a potential source of clutter into a functional and stylish asset that truly wows. Happy organizing!
Conclusion
Implementing a stylish and functional shoe rack in your living room entryway truly transforms the everyday experience. No more tripping over stray sneakers or searching for that missing pair – just a welcoming, organized space that sets a positive tone for your home. The smallest possible first step? Today, identify one pair of shoes that always ends up out of place and find a temporary home for them on a nearby shelf or basket.
If a dedicated shoe rack in the entryway isn’t quite right, consider a sleek console table with hidden storage for a more minimalist look, or a charming woven basket by the back door for a budget-friendly solution.
We hope these shoe rack in living room entryway ideas have inspired you! Keep exploring for more ways to bring beauty and order to every corner of your home.