Easy Door Storage Ideas for a Clutter-Free Home
Turn your doors into storage space with these 20 clever ideas! Are you tired of clutter creeping into every corner of your home? Do you find yourself constantly searching for that one missing item, only to realize it’s buried under a pile somewhere? I know I do! It’s a common frustration, especially when living spaces feel a little… cozy. But what if I told you that those often-overlooked vertical surfaces – your doors – could transform into functional, beautiful storage solutions? Imagine a home where everything has its place, your surfaces are clear, and finding what you need is a breeze. These ingenious hacks can make that vision a reality, often with minimal cost (think under $20!) and easily achievable in under an hour. In this article, I’ll show you how to unlock this hidden potential, revealing simple, practical ways to add ample storage without sacrificing an inch of floor space.
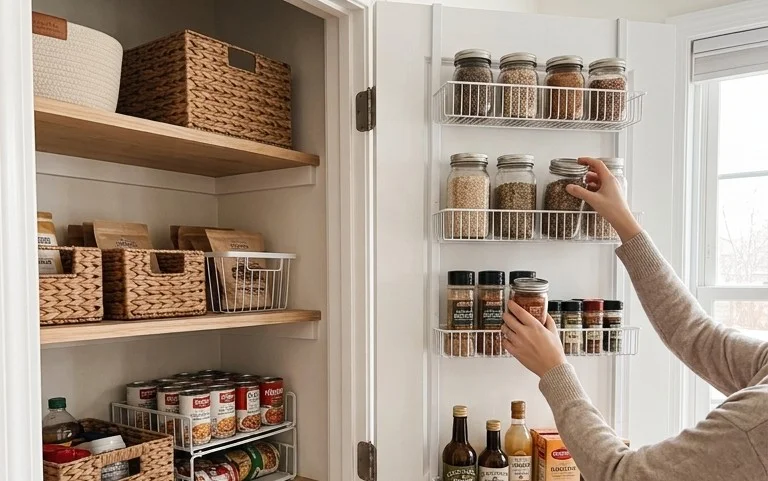
Turn Your Doors Into Storage Space With These 20 Clever Ideas
Are you drowning in clutter? Do you find yourself constantly tripping over things, or struggling to find space for your essentials? It’s a common problem, and one that many of us face in our homes, especially if we’re not blessed with sprawling square footage. But what if I told you that you’re overlooking a huge untapped resource for storage? I’m talking about your doors! Yes, those often-forgotten vertical surfaces are prime real estate for cleverly hidden storage. With a little imagination and some simple DIY, you can transform your doors into functional and stylish storage solutions. I’ve scoured the internet and experimented myself to bring you 20 fantastic ideas, covering everything from over-the-door organizers to creative ways to utilize the back of your closet doors. Let’s get started!
What You Need and Rough Costs
The beauty of using your doors for storage is that the required materials are often inexpensive and readily available. The cost will depend on the specific ideas you choose, but here’s a general breakdown.
For most over-the-door solutions, you’ll primarily need:
* **Over-the-door hooks or hangers:** These can range from simple metal hooks for $5-$15 for a pack of 4-10, to more elaborate multi-tiered organizers for $20-$50.
* **Adhesive hooks or strips:** A good quality set of command hooks can be found for $10-$25 for a pack of 10-20, perfect for lighter items.
* **Small shelves or baskets:** Wall-mounted shelves designed for doors can cost $15-$40 each. Baskets that attach to shelves or hooks vary widely, from $5-$20 per basket.
* **Screws, nails, or drill (if drilling is permitted):** If you’re drilling into the door itself, you’ll need appropriate hardware. A basic drill set might cost $40-$70. Screws and nails are typically a few dollars a box.
* **Measuring tape:** Essential for accuracy, a good measuring tape costs around $5-$10.
* **Optional: Paint or decorative paper:** If you want to customize your storage, budget $10-$30 for paint or a roll of wallpaper.
For more involved projects, like attaching shelving directly to the door (again, only if permitted), the cost will increase with the price of the shelving material itself, which could be anywhere from $20 to $100+ depending on the type and size.
How to Measure and Plan Before You Start
Before you even think about buying materials, accurate measurement and planning are crucial. This will save you time, money, and prevent frustrating mistakes.
1. **Measure Your Door:** Use your measuring tape to get the exact height and width of the door you intend to use. Note any architectural details, like raised panels or moulding, that might affect where you can place organizers.
2. **Assess the Door Swing:** Crucially, consider which way the door swings. You don’t want your storage solutions to impede the door’s movement or bang against walls or furniture when it opens. Measure the clearance needed for the door to open fully.
3. **Determine What You Want to Store:** This is the most important step! Walk around your house and identify problem areas. What items are cluttering up your surfaces? Think specific: shoes, cleaning supplies, toiletries, craft supplies, mail, scarves, hats, books, kids’ toys.
4. **Categorize and Quantify:** Once you know what you want to store, try to group similar items. How many pairs of shoes do you have? How many bottles of cleaning spray? This will help you determine the size and number of storage units you’ll need.
5. **Visualize the Space:** Imagine the door with the storage solutions attached. Will it look cluttered? Can you still access what you need easily? Consider the aesthetics – you want your doors to look intentional and tidy, not like a haphazard collection of items.
My Step-by-Step Guide to Transforming Doors
Let’s dive into a common and effective solution: using over-the-door organizers. This is a great starting point and can be adapted for many different areas of your home.
**Idea: Over-the-Door Shoe Organizer (for Closet Doors)**
This is a classic for a reason! It’s incredibly effective for decluttering hallways, bedrooms, or mudrooms.
1. **Gather Your Supplies:** You’ll need an over-the-door shoe organizer with clear pockets (I like ones with at least 20 pockets for maximum capacity), and a measuring tape. For a standard closet door, a typical organizer is about 65 inches long and 20 inches wide.
2. **Measure Your Door:** Measure the height of your closet door from top to bottom. Most closet doors are around 80 inches tall. Ensure the organizer you choose will fit vertically without bunching at the top or dragging on the floor. Measure the width of the door as well, though most organizers are designed to accommodate standard door widths.
3. **Assess the Door Frame:** Look at the top of your door. Most over-the-door organizers have hooks that slip over the top of the door. Ensure there’s enough clearance for these hooks to sit securely without obstructing the door from closing.
4. **Hang the Organizer:** Carefully slide the hooks of the organizer over the top of the door. Make sure it hangs straight and is centered.
5. **Load Your Shoes:** Begin by placing your shoes into the individual pockets. Try to pair them up and place one shoe per pocket. You can often fit two smaller shoes (like sandals or children’s shoes) in one pocket.
6. **Utilize Extra Pockets:** Don’t limit yourself to just shoes! These clear pockets are fantastic for storing other small items like toiletries, craft supplies, cleaning tools, sunglasses, or even snacks.
**Idea: Over-the-Door Hooks for Entryway Jackets and Bags**
This is perfect for your front door or the door of a mudroom or entryway.
1. **Gather Your Supplies:** You’ll need an over-the-door hook rack (look for one with 5-8 hooks), and your measuring tape. These racks typically cost $15-$30.
2. **Measure Your Door:** Measure the height of your door. Ensure the hook rack will hang at a comfortable height for coats and bags. You’ll want the top of the rack to be around 6-7 feet from the floor.
3. **Check Door Clearance:** As with the shoe organizer, ensure the hooks won’t prevent the door from closing or hit anything when it opens.
4. **Hang the Rack:** Slip the hooks over the top of the door.
5. **Organize Your Items:** Hang lighter jackets, scarves, hats, and handbags on the hooks. For heavier items like backpacks, consider a sturdier solution if the door isn’t very robust.
Adapting for Small Spaces and Rentals (No Drilling!)
Living in a rental or a tiny apartment doesn’t mean you have to forgo clever storage. The key here is utilizing damage-free solutions.
* **Adhesive Hooks:** For lighter items like keys, small accessories, or even rolled-up yoga mats, high-quality adhesive hooks (like Command hooks) are your best friend. They hold surprisingly well when applied correctly to a clean, dry surface.
* **Over-the-Door Organizers with Adjustable Hooks:** Many over-the-door organizers now come with adjustable hooks that can be bent or shaped to fit snugly over different door thicknesses without causing damage.
* **Command Strips for Shelving:** For lighter, wall-mounted shelves that you want to attach to a door (again, only if it won’t impede the swing), Command strips designed for shelves can be a game-changer. Make sure to check the weight limit.
* **Hanging Baskets:** Look for hanging baskets that attach to the top of the door without screws. These are great for holding toiletries in a bathroom, cleaning supplies under the sink (on the pantry door), or craft supplies.
Styling Notes: Making it Look Good
Storage doesn’t have to mean sacrificing style. Here’s how to make your door storage look intentional and chic.
* **Color Coordination:** If your doors are painted, consider using organizers that match or complement the door color. For example, white doors with white or clear organizers create a seamless look. For darker doors, you might opt for black, brushed nickel, or wooden organizers.
* **Texture Play:** Mix and match textures. If you have clear plastic pockets, consider adding some woven baskets for a softer feel. Wooden crates or fabric bins can also add warmth.
* **What to Put Where:**
* **Entryway Doors:** Hooks for coats, hats, scarves, keys. A shallow basket for mail.
* **Closet Doors:** Shoes, accessories (scarves, belts), folded t-shirts, cleaning supplies (in a bathroom or pantry closet).
* **Bathroom Doors:** Toiletries, hair tools, towels (rolled neatly).
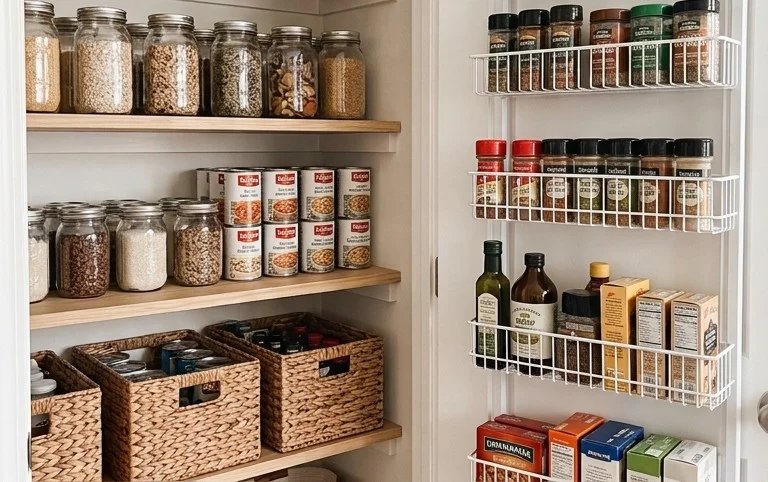
* **Pantry Doors:** Spices, cleaning supplies, snacks, reusable grocery bags.
* **Kids’ Room Doors:** Toys, books, art supplies.
* **Don’t Overstuff:** The key to keeping it looking good is not to cram every single pocket or hook to its absolute limit. Leave a little breathing room so items are easy to see and access.
Keeping it Tidy After Week One
The novelty of a new storage system can wear off, and clutter can creep back in. Here’s how to maintain order:
* **Daily Tidy-Up:** Spend 2-5 minutes each day putting items back in their designated spots. Hang your coat, put your shoes away, put that book back on the hook.
* **Weekly Reset:** Once a week, do a quick visual scan. Are any pockets overflowing? Are there items that don’t belong there? Do a quick declutter and rearrange as needed.
* **Seasonal Swaps:** For seasonal items (like winter coats or summer accessories), take advantage of the storage by swapping out items you won’t need for a few months. This keeps your everyday access areas clear.
* **One In, One Out Rule:** For items like shoes or accessories, try to adopt a “one in, one out” policy. When you buy a new pair of shoes, consider donating an old pair.
Mistakes That Make This Fail
Even the best intentions can go awry. Here are common pitfalls to avoid:
* **Ignoring Door Swing:** The most common mistake is attaching storage that prevents the door from opening fully or safely. Always measure clearance and consider how the door moves.
* **Overloading Organizers:** Trying to cram too much into a single pocket or hook will not only look messy but can also damage the organizer or the door itself. Respect weight limits.
* **Using the Wrong Adhesive:** For rental situations or when you can’t drill, using cheap or inappropriate adhesive hooks is a recipe for disaster. They’ll fall off, potentially damaging paint or the door surface. Always use quality, purpose-built adhesive products.
* **Neglecting the Aesthetics:** Simply slapping up mismatched organizers without any thought to color or style can make your space look cluttered rather than organized. Think about the overall look.
* **Not Planning for What You’re Storing:** If you’re planning to store heavy items, ensure the door and the mounting system can handle the weight. A flimsy closet door isn’t ideal for a heavy collection of books.
* **Forgetting About Maintenance:** Just like any other part of your home, your door storage needs occasional attention. If you don’t tidy it regularly, it will quickly become another source of clutter.
By following these tips and ideas, you can unlock a surprising amount of storage potential right on your doors. It’s a practical, often budget-friendly way to bring order to your home and create more functional living spaces. Happy organizing!
Conclusion
Transforming your doors into clever storage spaces is more than just a DIY project; it’s a daily game-changer. Imagine a tidier entryway, a more organized pantry, or a clutter-free bathroom – all thanks to utilizing often-overlooked vertical real estate. The feeling of knowing exactly where everything is, and having it easily accessible, brings a sense of calm and efficiency to your home that’s truly remarkable. Ready to start reclaiming your space? Your smallest first step could be as simple as measuring your pantry door for a hanging organizer. For a different room, consider over-the-door shoe racks for your bedroom closet. Or, for a budget-friendly option, simple hook-and-loop fasteners can turn any door into a temporary holder. Don’t stop here – there are countless ways to turn your doors into storage space!
