Mason Jar Oil Lamp: Easy Handmade Holiday Gift Ideas
Mason jar oil lamps are the perfect handmade holiday gift that brings cozy charm to any home! Are you tired of stumbling around in dim hallways, or wishing for a little extra warmth and sparkle during those long winter evenings? I know I am! Imagine soft, flickering light illuminating your living room, casting a beautiful glow on your holiday decorations and creating a truly magical atmosphere. This delightful project can be completed in under an hour, and with simple materials costing around $10-15, it’s an incredibly budget-friendly way to show you care.
In this article, I’ll walk you through exactly how to create your own beautiful mason jar oil lamps. We’ll cover everything from choosing the right materials to safely assembling your lamp, ensuring you can gift these handmade treasures with pride. Get ready to brighten someone’s holiday season (or your own!) with this wonderfully simple and rewarding DIY.
Crafting Cozy Ambiance: Your Guide to Handmade Mason Jar Oil Lamps for the Holidays
The crisp air of autumn is turning into the chill of winter, and the holidays are just around the corner. For me, this time of year is all about slowing down, embracing warmth, and creating a home that feels like a cozy sanctuary. And what better way to infuse that warmth and light into your space, or to share it as a thoughtful handmade gift, than with a beautiful mason jar oil lamp? These little gems are surprisingly simple to make, incredibly charming, and add a magical glow to any room. Plus, they’re a fantastic way to upcycle those jars you’ve been collecting.
Gathering Your Supplies: What You’ll Need and Roughly What it Costs
Let’s talk about what you’ll need to bring your mason jar oil lamp to life. The beauty of this project is its simplicity and affordability.
Here’s a breakdown of the essentials:
* **Mason Jars:** Any standard wide-mouth mason jar will work beautifully. For a typical lamp, a quart-sized (32 ounce) jar is perfect. You can often find these in packs of a dozen for around $15-$25 at grocery stores or craft shops. If you have some already, even better!
* **Lamp Wicks:** You’ll need wicks designed for oil lamps. These are typically cotton or fiberglass and come in rolls or pre-cut lengths. A roll of 100% cotton wicks, about 1/2 inch wide, can cost around $8-$15 and will last you for many projects.
* **Wick Holders/Assemblies:** These are small metal pieces that hold the wick in place and thread through the jar lid. You can purchase these as part of a kit, or buy them separately. A pack of 5-10 wick holders might cost $10-$20. Some come with a small metal cap to cover the wick when not in use, which is a nice touch.
* **Lamp Oil:** You’ll need a safe, clean-burning lamp oil. Paraffin oil or a vegetable-based lamp oil are good choices. Avoid kerosene, as it can produce a strong odor and soot. A 1-liter bottle of lamp oil typically costs around $10-$15 and will last a long time.
* **Drill and Metal Drill Bit:** You’ll need a drill with a metal drill bit that’s slightly larger than the diameter of your wick holder (usually around 1/4 to 1/2 inch). If you don’t own a drill, you might be able to borrow one, or factor in the cost of a basic drill, which can range from $50-$100.
* **Optional: Decorative Elements:** This is where you can get creative! Think about paint (acrylic craft paint works well for the exterior), twine, ribbon, faux greenery, or even small figurines to embellish your jars. These can add anywhere from $5-$20 depending on your choices.
So, for one lamp, if you have a drill, your estimated cost would be around $20-$40, depending on the decorative touches you choose. If you need to buy a drill, the initial investment will be higher, but you’ll have it for many future projects.
Measuring and Planning: Setting Yourself Up for Success
Before you even pick up a drill, a little planning goes a long way.
* **Jar Selection:** As I mentioned, wide-mouth jars are easiest to work with. The size of the jar will influence how much oil it holds and how long it burns. A quart jar can typically burn for 10-15 hours on a single fill.
* **Lid Measurement:** The most crucial measurement is for the wick holder. You need to ensure the hole you drill in the mason jar lid is the correct size for your wick holder to fit snugly. Most wick holders are designed to fit through a standard hole. If you bought a kit, check the packaging for recommended hole size. If you’re buying separate parts, hold your wick holder up to the lid and estimate where the center of the hole should be. You want it to be slightly off-center to allow for easy access to the wick for trimming.
* **Wick Length:** You don’t want the wick to be too long or too short. When inserted through the holder and into the jar, about 1/4 inch of the wick should extend above the holder. You can always trim it down after it’s in place.
* **Decorative Vision:** Think about the overall aesthetic you’re going for. Do you want a rustic look with twine? A modern feel with a clean, painted jar? This will guide your choices for decorative elements.
Your Step-by-Step Guide to Creating a Mason Jar Oil Lamp
Now for the fun part – making your lamp! It’s a straightforward process, and I promise, even if you’re new to DIY, you can do this.
1. **Prepare the Lid:** Take your mason jar lid. If it has a separate sealing ring, remove it for now. You’ll only be drilling into the flat metal part of the lid.
2. **Mark the Hole:** Decide where you want your wick holder to be. I usually position mine slightly off-center, about 1 inch from the edge of the lid. Use a pencil or a marker to make a small dot where you’ll drill.
3. **Drill the Hole:** This is where your drill comes in. If you’re using a metal drill bit, start slowly and apply steady pressure. Wear safety glasses to protect your eyes from any metal shavings. Once the hole is drilled, carefully smooth any rough edges with a metal file or sandpaper.
4. **Insert the Wick Holder:** Thread your wick holder through the hole you just drilled. It should fit snugly. If it’s a bit loose, you can use a small amount of waterproof sealant on the underside of the lid to secure it, but often a snug fit is enough.
5. **Prepare and Insert the Wick:** Take your lamp wick and thread it through the wick holder. You want about 1/4 inch of wick sticking out above the holder. If your wick holder has a small spout, make sure the wick goes through that.
6. **Decorate (Optional):** Now is the time to get creative! You can paint the outside of your mason jar (ensure it’s completely dry before proceeding), wrap it with twine, or tie on a ribbon. If you’re painting, use acrylic craft paints and consider a sealant for durability.
7. **Fill with Lamp Oil:** Carefully pour your lamp oil into the mason jar, filling it about two-thirds to three-quarters full. Avoid overfilling, as this can lead to spills.
8. **Prime the Wick:** This is a crucial step for a clean burn. Let the wick soak in the oil for at least 20-30 minutes, or even longer. You want the oil to saturate the entire wick.
9. **Trim the Wick:** Once the wick is thoroughly soaked, use a pair of scissors to trim the exposed part of the wick to about 1/4 inch above the wick holder. This ensures a steady, manageable flame.
10. **Light It Up!** Carefully light the wick with a long lighter or match. The flame should be about 1/2 to 1 inch high. Adjust the wick slightly by gently pulling more or less through the holder if needed. Place the lid back onto the jar, and enjoy the beautiful glow!
Adapting for Small Spaces and Rentals: No Drill, No Problem!
Living in a small apartment or a rental where drilling is a no-go? Don’t worry, you can still create beautiful mason jar oil lamps!
* **No-Drill Wick Holders:** You can find wick holders that are designed to sit directly on top of the mason jar opening, with a small spout that extends into the jar. These simply rest on the rim.
* **Adhesive Solutions:** For added stability, you can use a strong, clear adhesive like E6000 to secure the wick holder to the inside of the jar lid, or even directly onto the jar rim if you’re using a lidless style. Ensure the adhesive is fully cured before adding oil.
* **Pre-Drilled Lids:** Keep an eye out at craft stores or online; sometimes you can find pre-drilled mason jar lids specifically for this purpose, eliminating the need for a drill altogether.
Styling Notes: Where and How to Place Your Lamps for Maximum Ambiance
These little lamps are so versatile, and their styling possibilities are endless.
* **Color Palette:** Think about your existing decor. If you have a lot of warm, earthy tones, consider a lamp with a painted terracotta or deep ochre finish. For a more minimalist or Scandinavian feel, a clear jar with a natural twine wrap is perfect. White or cream painted jars offer a classic, elegant look.
* **Texture:** Mixing textures adds depth and interest. A smooth glass jar combined with the rough texture of twine, or the subtle sheen of a painted finish, creates a pleasing contrast. You can also add a small base for your lamp, like a decorative wooden coaster or a ceramic tile, to further enhance the texture and protect your surfaces.
* **Placement:**
* **Entryway:** A small lamp on a console table can welcome guests with a warm glow.
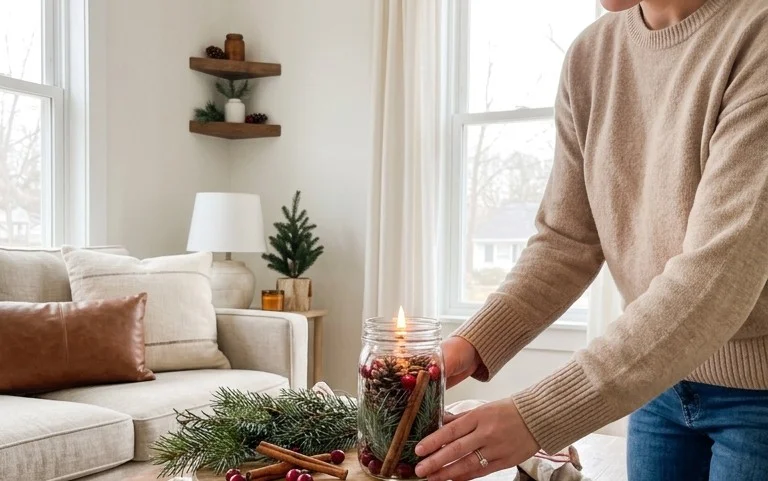
* **Living Room:** Cluster a few together on a coffee table or mantelpiece for a cozy centerpiece.
* **Bedroom:** A single lamp on a bedside table provides a soft, ambient light for reading or winding down.
* **Dining Table:** For a special occasion, a few small lamps can create an intimate and inviting dining atmosphere.
* **What to Put Where:** Once your lamp is lit, the focus should be on the flame. Avoid placing too many other decorative items directly around the lamp itself, as this can create clutter. Let the lamp be a focal point. If you’re using a jar with a decorative lid (like one with a decorative metal cap over the wick when not in use), ensure that cap is either removed or complements the overall look when the lamp is lit.
Keeping It Tidy After Week One: Maintaining Your Beautiful Lamp
To keep your mason jar oil lamp looking its best and burning cleanly, a little ongoing care is needed.
* **Wick Trimming:** This is the most important step. After each use, and before relighting, trim the wick to about 1/4 inch. This prevents the flame from getting too large, which causes soot and smoke.
* **Cleaning the Jar:** Periodically, you’ll want to clean the inside of the jar. If you notice any soot buildup on the glass, use a damp cloth with a little bit of dish soap to wipe it clean. For stubborn soot, you can use a mixture of vinegar and water.
* **Refilling Oil:** Only refill the lamp when it’s cool. Carefully pour in fresh lamp oil, but again, avoid overfilling.
* **Wick Replacement:** Lamp wicks don’t last forever. When you notice the wick is no longer absorbing oil properly, or if it starts to fray excessively, it’s time to replace it. This is a simple process of pulling out the old wick and threading in a new one.
Common Mistakes That Make This Project Fail
Even with a simple project, there are a few pitfalls to watch out for.
* **Using the Wrong Oil:** As I mentioned, stick to clean-burning lamp oils like paraffin or vegetable-based options. Kerosene is a common mistake and will lead to a smoky, smelly flame.
* **Wick Too Long or Too Short:** A wick that’s too long will produce a large, sooty flame. A wick that’s too short might not stay lit or will burn down too quickly. Aim for that consistent 1/4 inch.
* **Not Priming the Wick:** This is a critical step for a clean burn. If the wick isn’t saturated with oil, it will smoke and sputter, and might not even light properly. Give it ample soaking time.
* **Overfilling the Jar:** Too much oil can cause the oil to seep up the wick and potentially spill out of the jar, creating a fire hazard.
* **Ignoring Safety:** Always place your lamp on a stable, heat-resistant surface, away from flammable materials. Never leave a lit lamp unattended.
* **Drilling the Hole Too Large:** If the hole for your wick holder is too big, the holder might become loose and not sit securely, or oil could potentially leak.
Making your own mason jar oil lamps is a wonderfully rewarding way to add a touch of handmade charm and cozy light to your home, especially as the holidays approach. With a little care and attention, these beautiful creations will become cherished additions to your decor and thoughtful, heartfelt gifts for loved ones. Happy crafting!
Conclusion
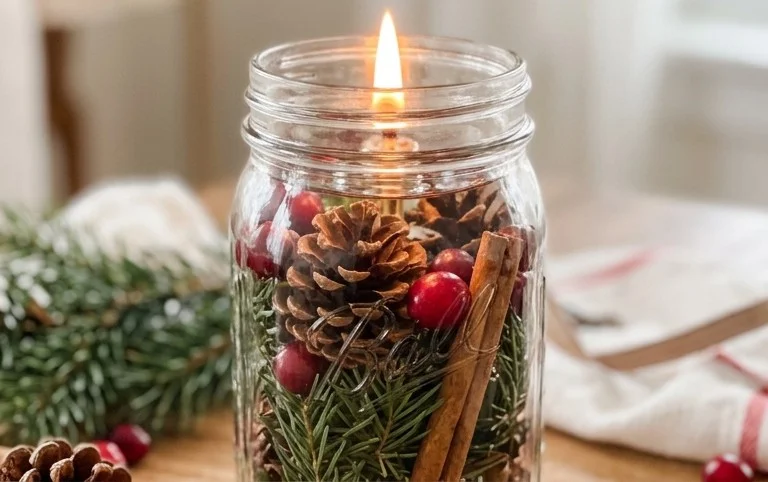
These charming mason jar oil lamps aren’t just beautiful; they bring a gentle, warm ambiance that can truly transform your living space, day to day. Imagine the cozy glow as you unwind in the evening or the inviting flicker during a quiet breakfast. They’re a simple yet profound way to add a touch of handmade warmth and personality to your home.
Ready to start crafting your own? Your smallest first step today could be as simple as gathering a mason jar from your pantry! For a touch of elegance in the bedroom, consider using a slightly smaller, decorative jar. On a tighter budget, an empty pickle jar cleaned thoroughly works wonderfully for a rustic kitchen accent. Let these mason jar oil lamps inspire you, and be sure to explore more delightful home decor and organization ideas here at Hearth and Vine!