Easy DIY Hanging Mason Jar Lights | Budget Decor Ideas
Magical DIY hanging mason jar lights are incredibly easy to make, and they’re the perfect solution for that nagging feeling of dim, uninspired corners in your home. You know the ones – maybe it’s that shadowy spot in your reading nook, the bland wall above your couch, or even just adding a touch of sparkle to your patio. Well, imagine transforming those spaces with a soft, warm glow that feels utterly enchanting! These beautiful, glowing jars will instantly add a cozy, whimsical ambiance that feels custom-made.
The best part? You can whip up these delightful lights in under 30 minutes for just a few dollars, using simple, readily available materials. In this article, I’ll show you exactly how to create your very own set of magical mason jar lights, step-by-step, so you can banish those dim spots and bring a little bit of everyday magic into your home.
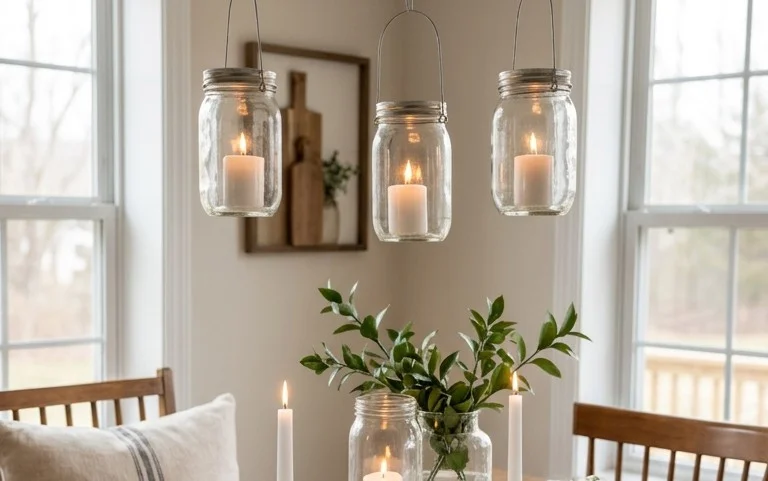
Magical DIY Hanging Mason Jar Lights: The Easiest Ever Project
Are you looking to add a touch of cozy, magical ambiance to your home without breaking the bank or undertaking a complicated DIY project? I’ve found the answer, and it’s incredibly simple: DIY hanging mason jar lights. These charming little creations are perfect for illuminating any corner of your house, from a dimly lit hallway to a cozy reading nook, and they’re so easy to make, you’ll wonder why you didn’t try them sooner. This is truly the easiest DIY project I’ve ever tackled, and the results are stunning.
What You’ll Need and Roughly What It Costs
The beauty of this project lies in its simplicity and affordability. Here’s what you’ll need:
- Mason Jars: You can use any size, but quart-sized (about 32 oz or 1 litre) are a great starting point. I usually find mine at craft stores or even the grocery store. Expect to pay around $10-$15 for a 12-pack of new jars. Alternatively, scour thrift stores for even cheaper options!
- Battery-Operated Fairy Lights: Look for strands with a small, discreet battery pack. These can be found online or at big box stores for about $5-$10 per strand. A 6.5 ft (2 meter) strand is usually perfect for a quart-sized jar.
- Twine or Jute String: This is for hanging. You can buy a roll for around $3-$5.
- Optional: Ribbon or decorative twine for extra flair.
- Optional: Wire cutters (if you need to trim the fairy light wire).
The total cost for a few jars can be as low as $20-$30, making this an incredibly budget-friendly way to add significant charm to your home.
Measuring and Planning Before You Start
Before you dive in, a little bit of planning goes a long way. Think about where you envision these lights. Are they going to hang in a cluster above a sideboard, or as individual accents in a bookshelf? Consider the height and spacing.
- Spacing: If you’re hanging multiple jars, measure the distance between where you want each one to be. For example, if you’re creating a cluster above a shelf, measure the width of the shelf and divide by the number of jars you want. I usually aim for about 6-8 inches (15-20 cm) between jars for a pleasing visual effect.
- Height: Decide how low you want the jars to hang. Measure from your hanging point (be it a hook or a sturdy shelf) down to where you want the top of the jar to be. Remember to account for the length of the twine you’ll use for hanging.
- Light Strand Fit: Gently unfurl your fairy light strand and see how it fits inside your chosen mason jar. You want it to be long enough to drape pleasingly inside without being too cramped or too sparse. Most 6.5 ft (2 meter) strands fill a quart-sized jar beautifully.
A Clear Numbered Walkthrough of the Process
Now for the fun part! This is so straightforward, you’ll be done in no time.
- Prepare the Jar: Make sure your mason jar is clean and dry. Remove any labels if you want a clear, unobstructed view of the lights.
- Insert the Fairy Lights: Carefully feed the battery pack and the wire of the fairy lights into the jar. You can push the battery pack down to the bottom or let it sit near the opening, depending on your preference. Gently arrange the fairy light strand inside the jar so it drapes naturally. Don’t force it; let the wire fall where it may.
- Secure the Battery Pack (Optional but Recommended): If your battery pack is loose and might fall out, you can secure it. Some people use a small piece of double-sided tape inside the jar lid or even a tiny dab of hot glue (though this makes it less removable). For the easiest method, simply let the wire itself hold it in place by angling the lid slightly.
- Prepare the Twine Hanger: Cut a length of twine. The length will depend on how low you want your jar to hang. For a medium drop, I usually cut about 2-3 feet (60-90 cm) of twine.
- Create the Hanger: Tie one end of the twine securely around the neck of the mason jar, just below the threads. Make a strong knot.
- Form the Hanging Loop: Bring the two ends of the twine up and tie them together at the desired height to create a loop for hanging. Ensure the knot is secure. You can adjust the length by retieing the knot.
- Attach to Your Hanging Point: If you’re hanging from a hook, simply place the twine loop over the hook. If you’re hanging from a shelf edge, you might need to get creative, perhaps looping the twine around a sturdy knob or a decorative bracket.
- Turn it On! Insert batteries into the battery pack and switch on your fairy lights. Marvel at the instant magic!
How to Adapt It for a Small Space or a Rental Where You Cannot Drill
Don’t let a lack of drilling space deter you! This project is a renter’s best friend.
- Command Hooks: These adhesive hooks are a lifesaver. They hold a surprising amount of weight and come off cleanly. For heavier jars, use a heavy-duty Command hook. Measure the weight of your jar with the lights inside to be sure.
- Shelf Brackets: If you have shelves, you can hang jars from the underside using small S-hooks or even by tying the twine directly around the shelf edge if it’s thick enough and the jar isn’t too heavy.
- Door Knobs: Hang them from existing door knobs for a whimsical touch.
- Curtain Rods: A sturdy curtain rod can also be a great hanging point.
- Clamps: For temporary displays, consider using decorative clamps to attach the twine to furniture edges or even sturdy fabric.
The key is to assess your existing fixtures and use adhesive solutions or creative tying methods rather than drilling.
Styling Notes: Color, Texture, and Placement
Once your lights are hanging, it’s time to make them shine with intention.
- Color: The warm glow of fairy lights is inherently cozy. They pair beautifully with natural wood tones, soft grays, and muted blues. If your jars are clear, the light will be pure and bright. If you have frosted or colored jars, the light will diffuse and create a different mood. Consider using colored ribbon or twine to complement your existing decor. For a rustic look, use natural jute. For a more refined feel, opt for satin ribbon.
- Texture: The glass of the mason jar provides a smooth, reflective texture. Contrast this with surrounding elements. If your jars are hanging near a plush rug or a woven basket, it creates a lovely textural interplay. You can also add natural elements inside the jars if you remove the battery pack temporarily: think dried flowers, small pinecones, or even a sprig of eucalyptus for a touch of greenery.
- Placement: Think about what you want to illuminate. A dark corner that feels a bit forgotten? A cluster of jars above a console table can create a welcoming focal point. Near a mirror? The light will reflect, amplifying the glow. In a child’s room? They provide a gentle nightlight. Don’t overcrowd a small space; a single well-placed jar can be just as impactful as a cluster.
How to Keep It Tidy After Week One
The beauty of this DIY is its low maintenance. However, a few tips will keep them looking their best:
- Dusting: A soft brush or a microfiber cloth will easily dust the outside of the jars. If dust accumulates inside, you might need to carefully remove the fairy lights and wipe down the interior.
- Battery Replacement: Keep an eye on the battery life. When the lights start to dim, it’s time for fresh batteries. Make sure to have a stash of the correct type on hand.
- Twine Check: Periodically check the knots on your twine hangers to ensure they are still secure, especially if they are in an area with a lot of foot traffic or if you have pets or children who might bump into them.
Mistakes That Make This Fail
While this project is incredibly forgiving, a few missteps can lead to disappointment:
- Overcrowding the Jar with Lights: Jamming too many lights into the jar can make them look messy and can even overheat the battery pack. Aim for a natural drape that fills the space without being bunched up.
- Using the Wrong Hanging Method: Forgetting to test the weight-bearing capacity of your chosen hanging method (especially with Command hooks) can lead to jars falling. Always err on the side of caution and use a hook rated for more weight than you think you’ll need.
- Ignoring Safety with Battery Packs: Ensure the battery pack is not dangling precariously where it could be a fire hazard or easily pulled by pets or children. Secure it as best as you can.
- Forgetting to Check for Loose Wires: Before turning them on, give the fairy light strand a gentle wiggle to make sure no wires are snagged or pulled too tightly.
- Using Too Much Twine for Hanging: If your twine is too long, the jars will hang too low and could be a tripping hazard or look disproportionate. Measure carefully!
With these tips, you’ll be well on your way to creating your own magical, glowing haven. Enjoy the process and the beautiful ambiance these simple DIY mason jar lights bring to your home!
Conclusion
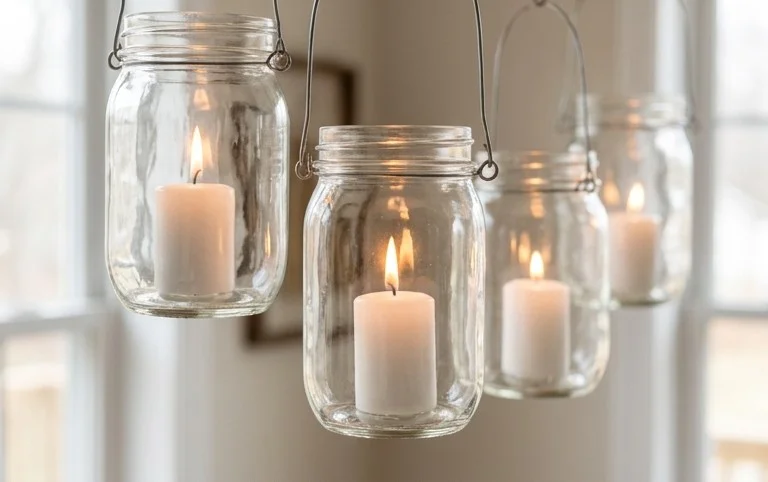
These magical DIY hanging mason jar lights are more than just a simple craft; they’re a delightful way to transform everyday spaces. Imagine the gentle glow, creating a cozy ambiance that makes coming home feel even more special, day to day. The best part? You can start today with the easiest step: gathering a single mason jar and a string of battery-operated fairy lights. For a different vibe, consider a wider-mouthed jar for a more abundant light source, or for a budget-friendly twist, repurpose old pickle jars!
Ready for More Magic?
This project is just the beginning of what you can achieve. Explore more inspiring home decor and organization ideas to keep your living space feeling fresh and inviting.
